

Safety stock: the formula and how much to actually hold
Safety stock — also called buffer stock — is extra inventory held beyond expected demand so a late supplier or a demand spike does not become an empty shelf. Too little and you lose sales; too much and your cash sits in cardboard. This guide covers the formula, a worked example, and practical rules for sizing the buffer.
What is safety stock?
Safety stock is the extra inventory you hold beyond your expected demand to absorb surprises — a demand spike, a late supplier, or a count that was off by a case. It is the buffer that keeps you selling while the unexpected plays out. "Buffer stock" is the same idea under a different name; the two terms are used interchangeably, so a "buffer stock formula" and a "safety stock formula" compute exactly the same number.
Safety stock is not a standalone target you manage in isolation — it is one ingredient of your reorder point. The relationship is: Reorder Point = (Lead Time × Daily Demand) + Safety Stock. The first part covers the stock you expect to sell while you wait for a replenishment; safety stock is the cushion on top for the days that beat the average.
Because it sits inside the reorder point, getting safety stock wrong throws off every replenishment decision downstream: size it too small and alerts fire too late to save the sale, size it too large and you trigger orders early and carry dead weight. The whole point of this guide is to size it deliberately instead of guessing.
Why hold safety stock at all?
Every number in your planning is an average: average daily sales, average supplier lead time. Reality is not average. Demand spikes the week a competitor runs out; the supplier’s truck breaks down; a count was off. Safety stock is the deliberate gap between what the averages say and what actually happens — the inventory equivalent of not scheduling your day down to the last minute because you know traffic exists.
Without a buffer, you are betting that demand and lead time will both land on their averages at the same time — and averages are exceeded roughly half the time by definition. The cost of that bet is a stockout: a lost sale at best, a lost customer at worst, and for critical parts a stopped production line. Safety stock is the premium you pay to make those events rare instead of routine.
The catch is that the buffer is not free either. It ties up cash and shelf space, so the goal is never "as much as possible" — it is the smallest cushion that keeps stockouts below the level you can actually tolerate. The rest of this guide is about finding that number.
The simple safety stock formula (start here)
The simplest reliable safety stock formula — the one to start with — is: Safety Stock = (Maximum daily usage × Maximum lead time) − (Average daily usage × Average lead time). In words: cover the worst realistic case, minus what your reorder point already covers on an average day. It uses four numbers you can pull straight from sales history and supplier records, with no statistics required. This is the same arithmetic whether you call it a safety stock formula or a buffer stock formula.
Here is a worked example. Say average daily usage is 20 units, but your busiest recent day hit 32 units. Your average supplier lead time is 7 days, but the worst recent order took 10 days. Plug those in: Safety Stock = (32 × 10) − (20 × 7) = 320 − 140 = 180 units. That 180-unit cushion covers the gap between a normal week and a bad one on both demand and delivery at the same time.
Carry it straight into the reorder point: Reorder Point = (7 × 20) + 180 = 140 + 180 = 320 units. So you fire a new order when on-hand drops to 320 — 140 units to sell through the average lead time, 180 in reserve for the days that beat the average. That single worked chain, demand and lead time into buffer into trigger, is the whole method.
The service-level (z-score) method
When you want precision — and have clean demand history — the statistical version sizes the buffer to a chosen service level, the percentage of demand you want to fill without a stockout. The formula is: Safety Stock = Z × σ, where σ is the standard deviation of demand during the lead-time window and Z is the service-level factor from the standard normal distribution.
The Z value comes straight from your target service level: 90% service level uses Z = 1.28, 95% uses Z = 1.65, and 99% uses Z = 2.33. Higher service levels cost disproportionately more buffer — going from 95% to 99% roughly doubles the cushion — so reserve the high numbers for critical items where a stockout stops work, and accept 90% on low-value, easily substituted stock.
The honest constraint: σ needs consistent, per-item demand history to be meaningful, which scan-based tracking produces and patchy spreadsheets rarely do. If your history is thin or noisy, do not fake precision — stay on the simple max-minus-average formula above until the data earns the upgrade. The right method is the more precise one your data can actually support, not the most sophisticated one on the page.
How much should you hold? Rules of thumb
Before you reach for either formula, a set of rules of thumb gets you close by item type. Critical or high-margin items: hold roughly 1.5–2 weeks of average demand. If a stockout stops a job or loses a customer, err generous — the carrying cost is cheaper than the downtime. Steady, easily replaceable items with a reliable supplier and stable demand: 2–5 days of demand is plenty; a thin buffer is enough when you can reorder quickly from multiple sources.
Cheap, slow-moving, or perishable items: little to none. Buffer stock on slow movers quietly turns into dead stock — cash frozen in inventory you may never sell — so accept the occasional stockout instead of carrying insurance that costs more than the risk it covers.
Then adjust from evidence, roughly quarterly. Repeated stockouts mean the buffer is too small; items gathering dust while turnover drags mean it is too big. Your inventory turnover tells you which direction you are drifting, and the formulas above give you a defensible starting number — but the real safety stock level is the one your own stockout-and-dust history keeps confirming.
Common safety stock mistakes
The most common mistake is holding too much "to be safe." Excess safety stock ties up cash, eats storage, drags down inventory turnover, and for perishable or trend-driven goods becomes dead stock. A bigger buffer feels prudent, but past the point that covers your tolerable stockout rate it is pure cost with no return.
The second is setting the buffer once and never revisiting it. Demand shifts, suppliers get faster or slower, and seasons turn — a safety stock number that was right in spring is stale by autumn. Recompute at least quarterly, and immediately after any lead-time change, because a stale buffer silently sizes today’s risk with last quarter’s reality.
The third is ignoring lead-time variance. Many teams pad for demand swings but treat supplier lead time as a fixed number, when an unreliable single-source supplier is often the bigger risk. If a supplier’s delivery time itself swings, that variability belongs in the buffer — the max-minus-average formula captures it through the maximum-lead-time term, which is one reason it is a safer starting point than a demand-only calculation.
Safety stock in StockZip
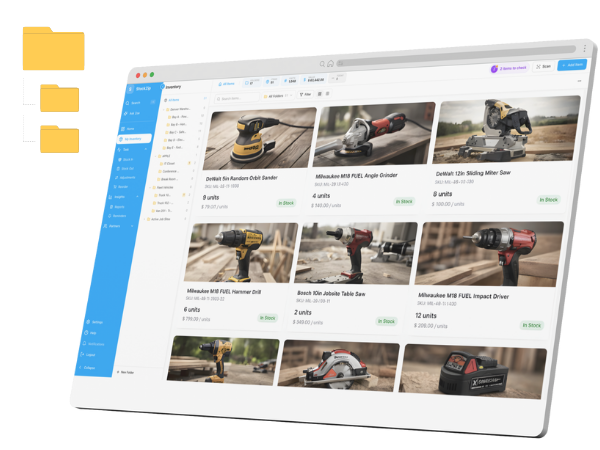
Every formula above assumes you know your real usage and your real stock level — and that is exactly what StockZip records. Each barcode scan updates quantities and builds the per-item movement history the formulas need, and per-item minimum levels plus low-stock alerts let you enforce the buffer you calculated: set the minimum at your reorder point and the alert fires when on-hand crosses it. Scanning, per-item minimums, and low-stock alerts are all on the Free plan.
For the numbers that feed the math, plug your own figures into the free safety stock calculator and reorder point calculator to see the buffer and trigger level together without doing the arithmetic by hand. The per-item usage history that the z-score method’s σ depends on is easiest to pull from movement and valuation reports, which are a paid feature (Starter and up) — the Free plan does not include reports, so on Free you would size σ from a spreadsheet export instead.
The honest summary: StockZip won’t pick your service level for you, but it keeps counts accurate by scan, holds a per-item minimum at whatever reorder point your safety stock implies, and alerts you when you cross it — which is the operational half of safety stock once you have chosen the number.